Video storage (Backblaze B2)
About 5 minutes · free, no card
Postline keeps your queued videos in your own storage bucket until they post, then deletes them. Backblaze B2 gives 10 GB free without a card - enough for a few hundred short videos waiting at once.
Create the bucket
- 1
Open backblaze.com/sign-up/cloud-storage and sign up with your email. Choose B2 Cloud Storage.
- 2
Confirm your email, then sign in. You land on B2 Cloud Storage → Buckets.
- 3
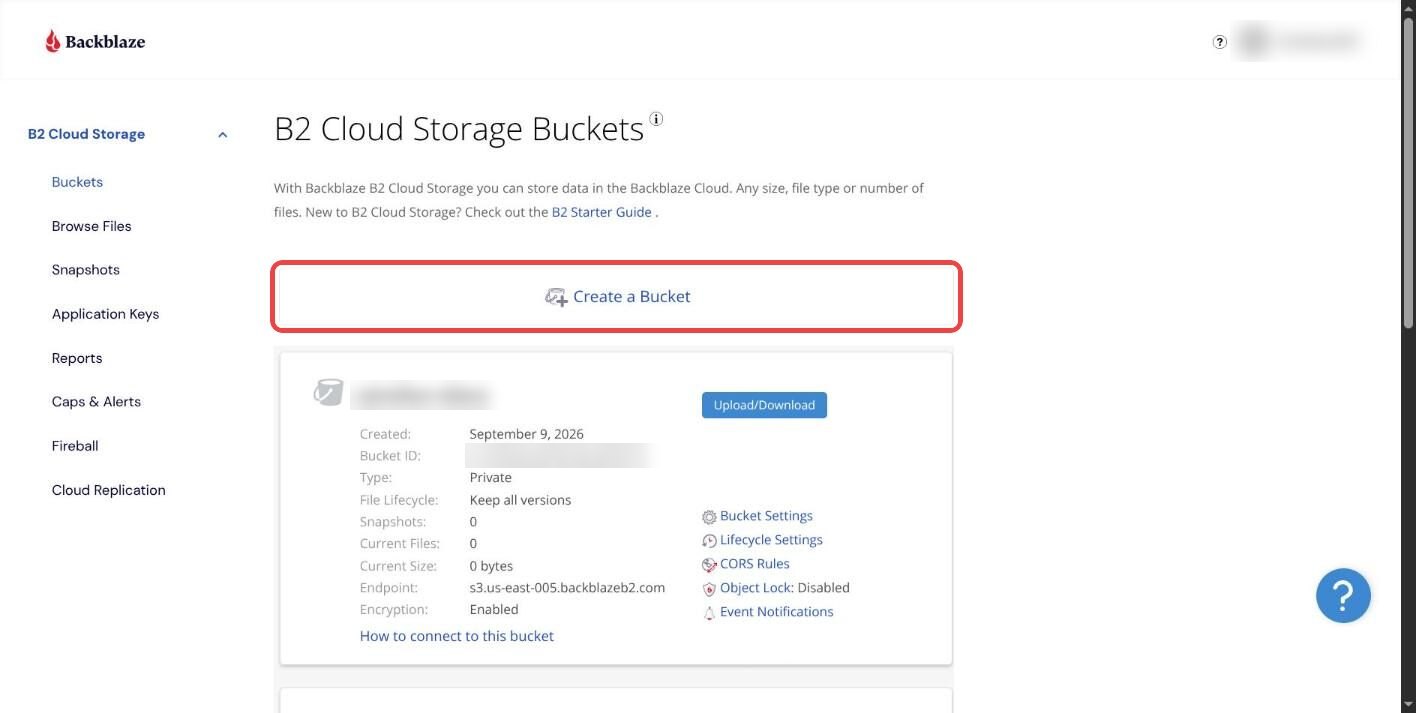
Click Create a Bucket.
- 4
Bucket name: something unique like
yourname-postline-videos(only letters, numbers and dashes).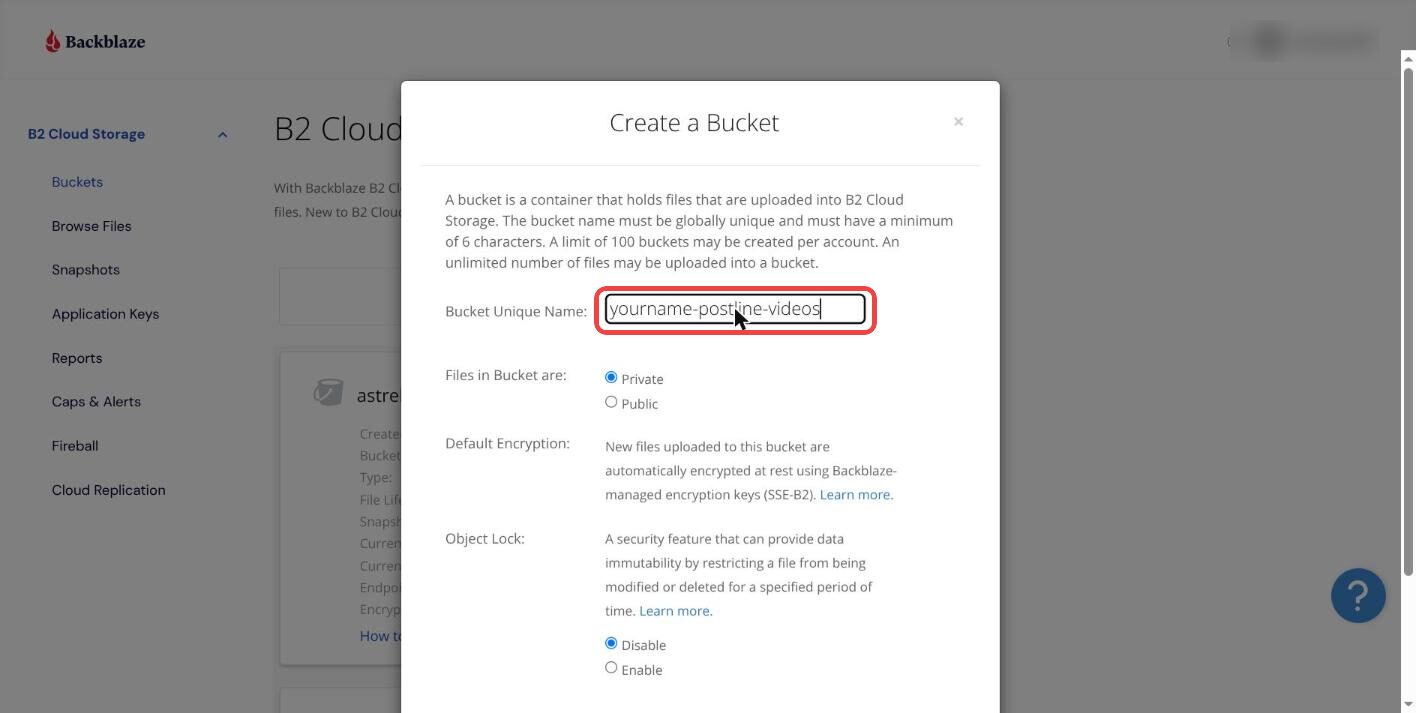
- 5
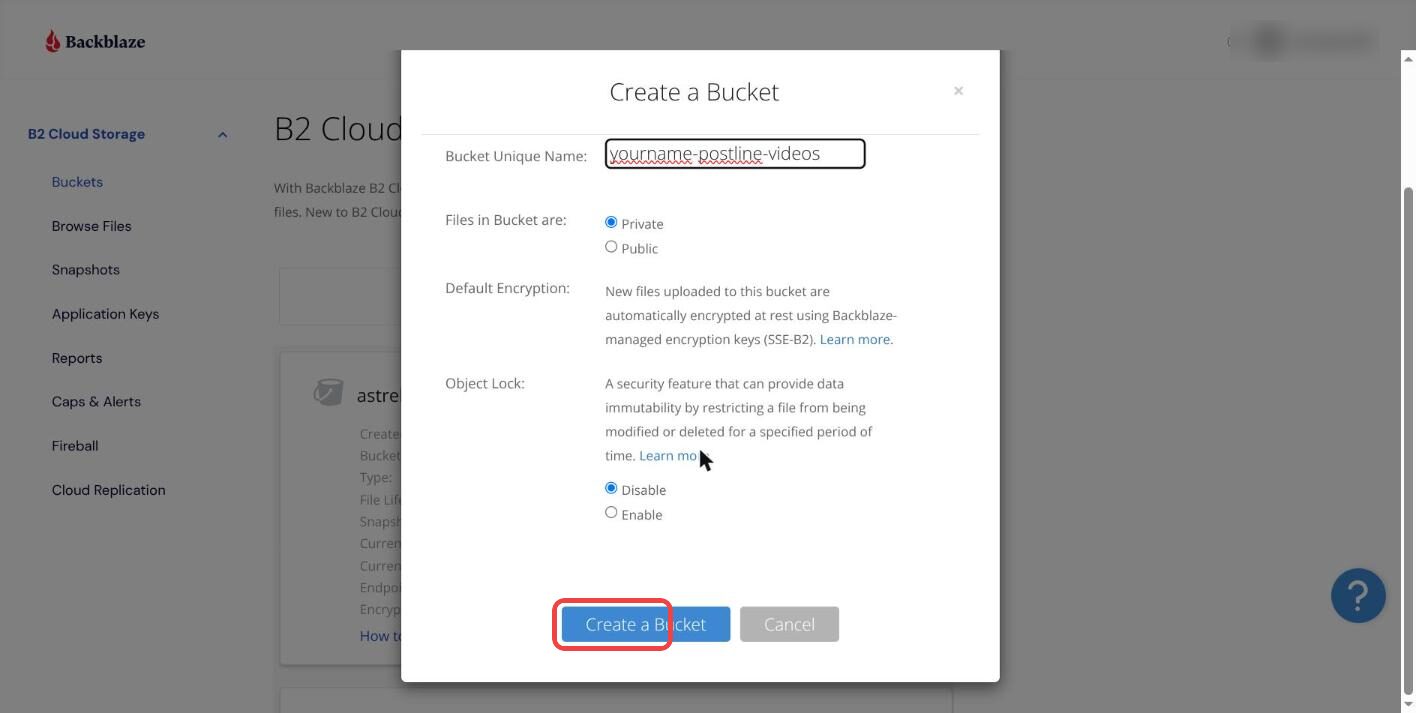
Files in Bucket are: Private. Leave encryption and object lock as they are.
- 6
Click Create a Bucket. On the new bucket's card, copy the Endpoint - it looks like
s3.us-east-005.backblazeb2.com.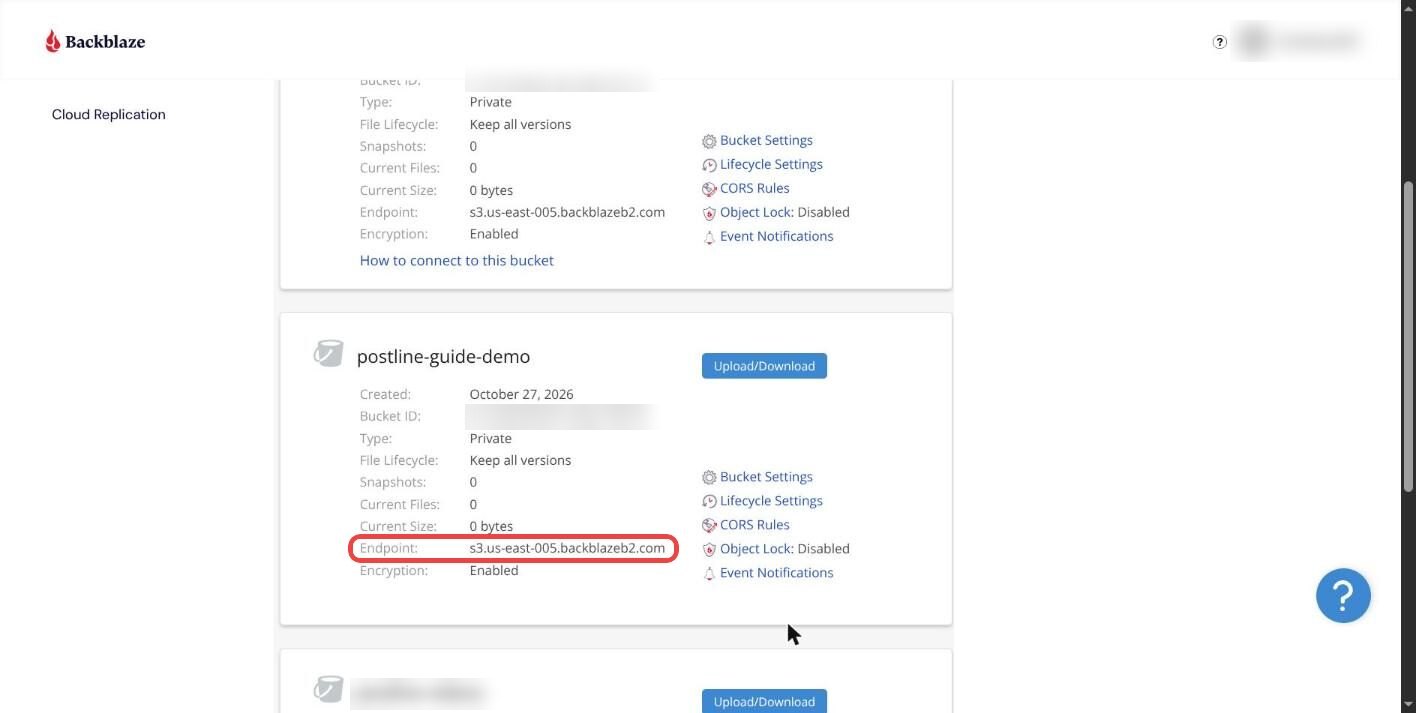
Create a key for Postline
- 1
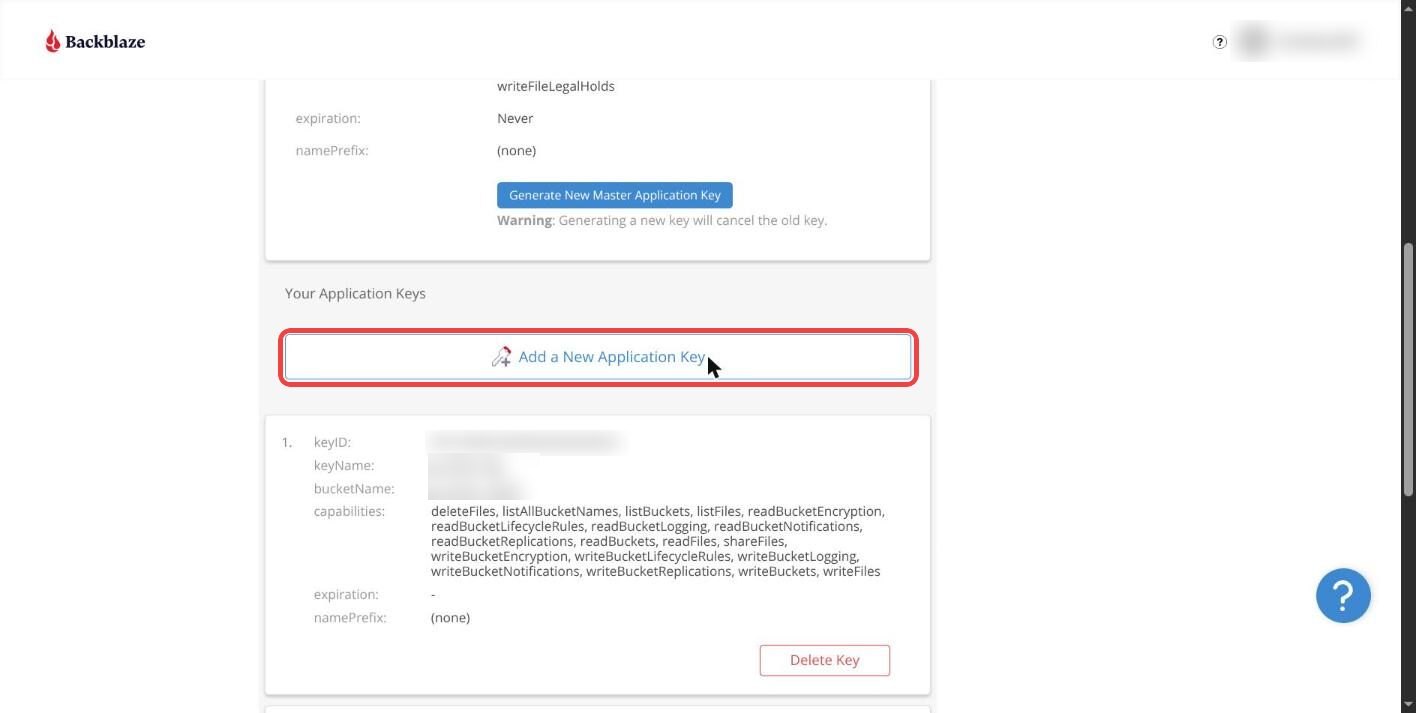
In the left menu click Application Keys, then Add a New Application Key.
- 2
Name:
postline. Allow access to Bucket(s): pick your new bucket (not all buckets).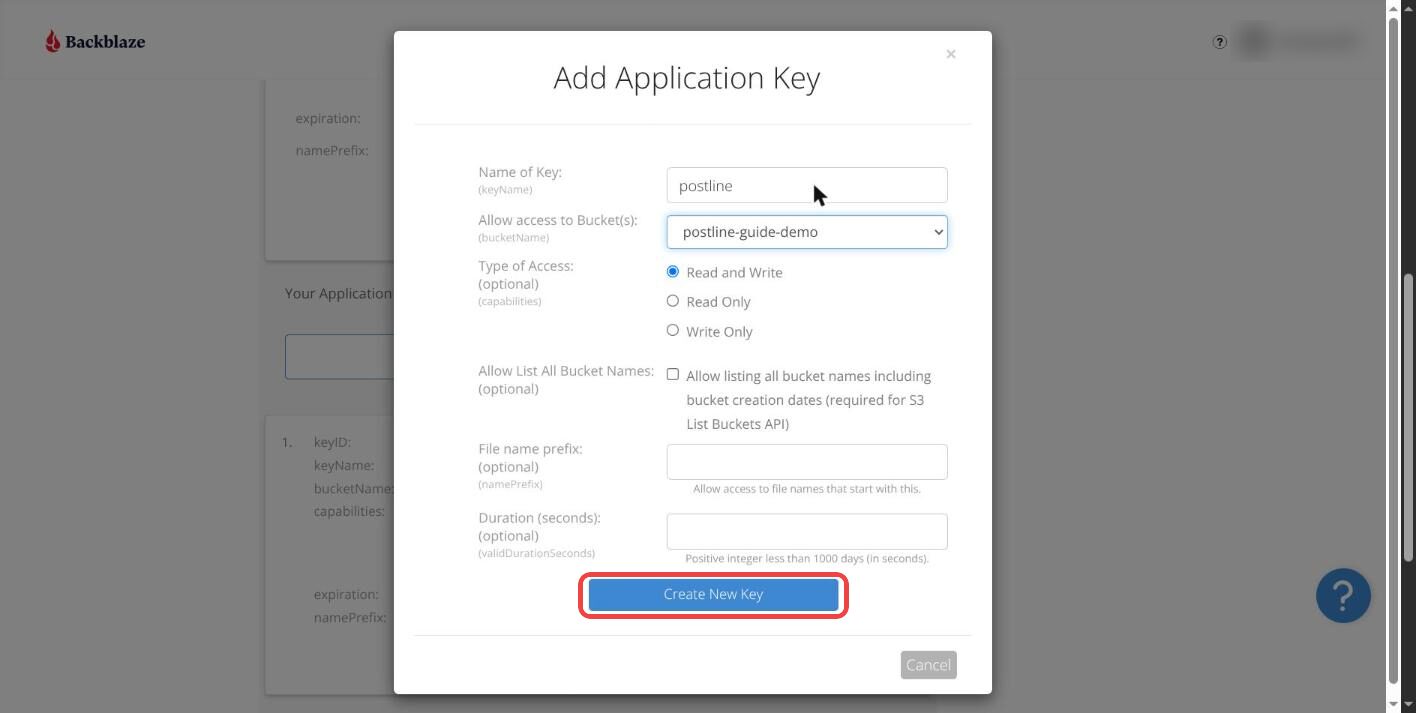
- 3
Type of Access: Read and Write. Leave the other boxes empty and click Create New Key.
- 4
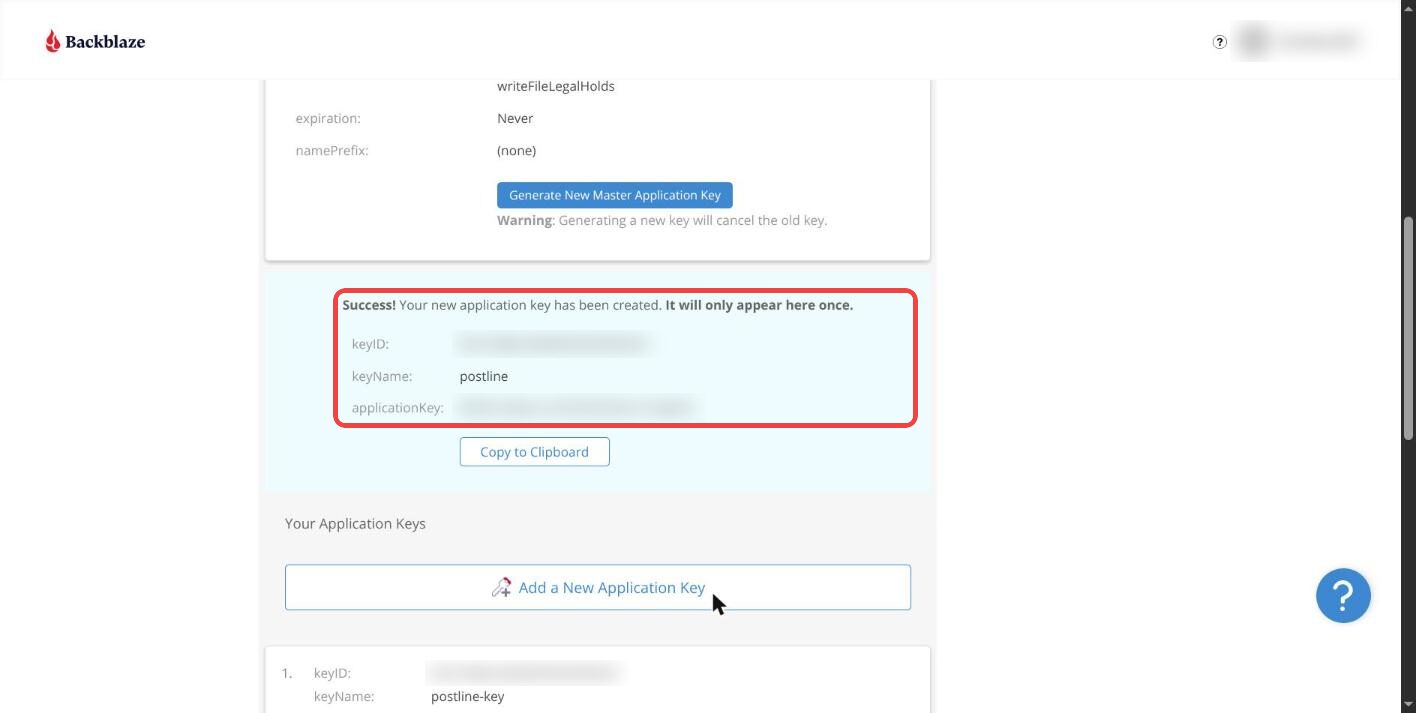
Backblaze shows keyID and applicationKey once. Copy both now.
The applicationKey is a password. Paste it only into Postline's Settings - never into a chat or email.
Connect it in Postline
- 1
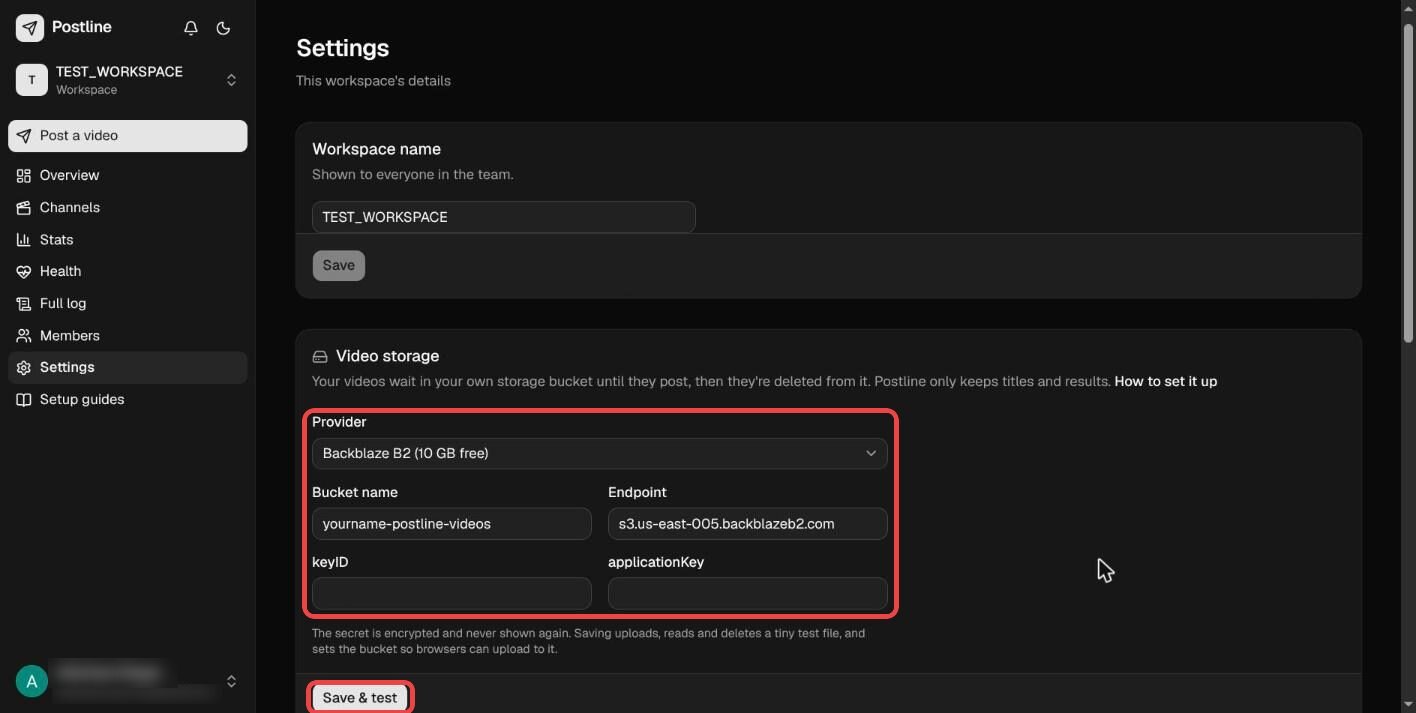
In Postline open Settings → Video storage → Use my own bucket.
- 2
Provider: Backblaze B2. Fill in the bucket name, endpoint, keyID and applicationKey.
- 3
Click Save & test. Postline uploads, reads and deletes a small test file, and sets the bucket so your browser can upload to it.
- 4
You see a green check with the bucket's name. Uploads now go straight to your bucket.
If something goes wrong
- “The key ID or secret is wrong”
- Copy the keyID and applicationKey again - the applicationKey is shown only once, so make a new key if you lost it.
- “No bucket called that at this endpoint”
- The endpoint must be the one shown on that bucket's card, and the name must match exactly.
- “Postline couldn't set the bucket's upload rules”
- The key needs access to the bucket it was made for. Make a new key restricted to this bucket with Read and Write, and save again.
- Using Cloudflare R2 or Amazon S3 instead?
- Pick it under Provider. You need the bucket name, the S3 endpoint and an access key with read and write. Postline sets the upload rules for you there too.